> ## Documentation Index
> Fetch the complete documentation index at: https://runpod-b18f5ded-public-endpoints.mintlify.site/llms.txt
> Use this file to discover all available pages before exploring further.
# Export data
You can export your Pod's data to any of the following cloud providers:
* Amazon S3
* Google Cloud Storage
* Microsoft Azure Blob Storage
* Dropbox
* Backblaze B2 Cloud Storage
Remember to keep your keys and access tokens confidential to maintain the security of your resources.
## Amazon S3
You can review a video guide on the process [here](https://www.youtube.com/watch?v=2ZuOKwFR9pc\&t=1s).
### Creating a Bucket within Amazon S3
1. **Access the Bucket Creation Form:**
* Navigate to the Amazon S3 bucket creation form by visiting [this link](https://s3.console.aws.amazon.com/s3/bucket/create?region=us-east-1).
2. **Name Your Bucket:**
* Provide a descriptive name for your bucket. Choose a name that is easy to remember and reflects the contents or purpose of the bucket.
3. **Select AWS Region:**
* Ensure you select your preferred AWS Region. This is important for data storage locations and can affect access speeds.
4. **Adjust Public Access Settings:**
* Uncheck the **Block All Public Access** option at the bottom of the form if you need your bucket to be publicly accessible.
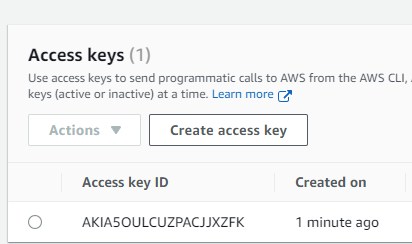
5. **Access Key and Secret Access Key:**
* Go to Security Credentials in your AWS account.
* Create an Access Key on the Security Credentials page.
* Note that your Secret Access Key will be displayed during this process. Keep it secure.
 ### Sending Data from Runpod to AWS S3
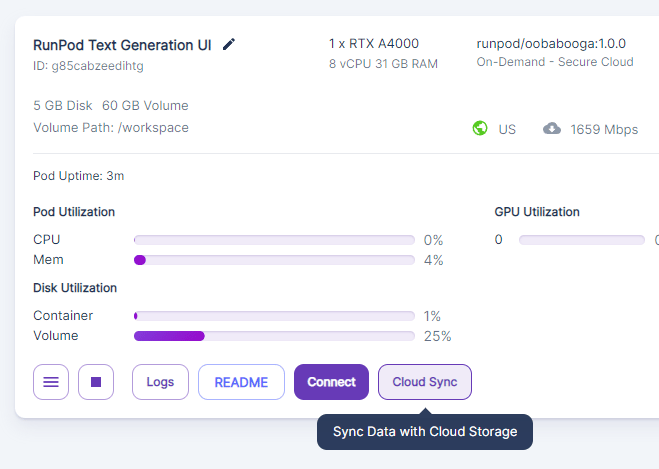
1. **Access CloudSync in Runpod:**
* In Runpod, navigate to the CloudSync section.
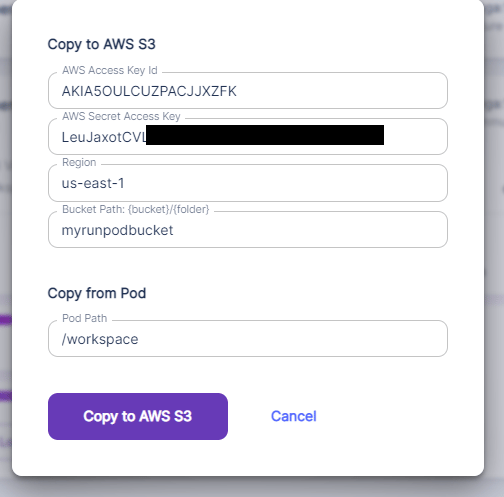
2. **Enter Key IDs and Bucket Information:**
* Enter your Access Key and Secret Access Key.
* Specify the AWS Region where your bucket is located.
* Provide the path of your bucket as shown in the interface.
3. **Initiate Data Transfer:**
* Select the **Copy to AWS S3** option.
* This action will start copying your pod contents to the specified Amazon S3 bucket.
4. **Monitor Transfer:**
* Once you select Copy, your pod contents should begin copying over to Amazon S3.
* You can monitor the transfer process through Runpod’s interface to ensure that the data transfer completes successfully.
### Sending Data from Runpod to AWS S3
1. **Access CloudSync in Runpod:**
* In Runpod, navigate to the CloudSync section.
2. **Enter Key IDs and Bucket Information:**
* Enter your Access Key and Secret Access Key.
* Specify the AWS Region where your bucket is located.
* Provide the path of your bucket as shown in the interface.
3. **Initiate Data Transfer:**
* Select the **Copy to AWS S3** option.
* This action will start copying your pod contents to the specified Amazon S3 bucket.
4. **Monitor Transfer:**
* Once you select Copy, your pod contents should begin copying over to Amazon S3.
* You can monitor the transfer process through Runpod’s interface to ensure that the data transfer completes successfully.
 Remember to keep your Access Key and Secret Access Key confidential to maintain the security of your AWS resources.
## Google Cloud Storage
### Creating a Bucket within Google Cloud Storage
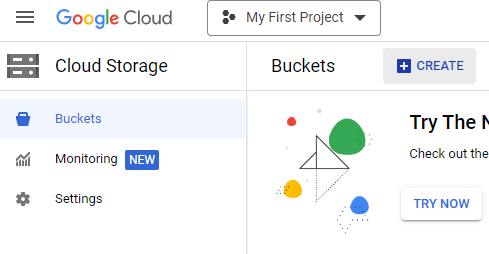
1. **Access the Bucket Creation Interface:**
* Navigate to the Google Cloud Storage dashboard and click on "Buckets -> Create" to access the bucket creation interface.
2. **Name Your Bucket:**
* Assign a unique, descriptive name to your bucket that reflects its contents or purpose.
3. **Configure Bucket Settings:**
* Leave most options as default. Important: Uncheck "Enforce Public Access Prevention On This Bucket" if you need your bucket to be publicly accessible.
4. **Organize Your Bucket:**
* Once the bucket is created, consider creating a folder within the bucket for better organization, especially if managing multiple pods.
Remember to keep your Access Key and Secret Access Key confidential to maintain the security of your AWS resources.
## Google Cloud Storage
### Creating a Bucket within Google Cloud Storage
1. **Access the Bucket Creation Interface:**
* Navigate to the Google Cloud Storage dashboard and click on "Buckets -> Create" to access the bucket creation interface.
2. **Name Your Bucket:**
* Assign a unique, descriptive name to your bucket that reflects its contents or purpose.
3. **Configure Bucket Settings:**
* Leave most options as default. Important: Uncheck "Enforce Public Access Prevention On This Bucket" if you need your bucket to be publicly accessible.
4. **Organize Your Bucket:**
* Once the bucket is created, consider creating a folder within the bucket for better organization, especially if managing multiple pods.
 ### Transferring Data from Runpod to Google Cloud Storage
1. **Access CloudSync in Runpod:**
* Within Runpod, go to the CloudSync section and select "Google Cloud Storage -> Copy to Google Cloud Storage."
2. **Service Account JSON Key:**
* Obtain your Service Account JSON key. If unsure how to do this, consult [this guide](https://cloud.google.com/iam/docs/keys-create-delete).
* In the provided field on Runpod, paste the entire contents of your Service Account JSON key.
3. **Specify Transfer Details:**
* Enter the destination path in your bucket.
* Choose the folder from your pod that you wish to copy.
4. **Initiate and Monitor Transfer:**
* Start the data transfer process by selecting the relevant options.
* Monitor the transfer in the Runpod interface to ensure successful completion.
### Transferring Data from Runpod to Google Cloud Storage
1. **Access CloudSync in Runpod:**
* Within Runpod, go to the CloudSync section and select "Google Cloud Storage -> Copy to Google Cloud Storage."
2. **Service Account JSON Key:**
* Obtain your Service Account JSON key. If unsure how to do this, consult [this guide](https://cloud.google.com/iam/docs/keys-create-delete).
* In the provided field on Runpod, paste the entire contents of your Service Account JSON key.
3. **Specify Transfer Details:**
* Enter the destination path in your bucket.
* Choose the folder from your pod that you wish to copy.
4. **Initiate and Monitor Transfer:**
* Start the data transfer process by selecting the relevant options.
* Monitor the transfer in the Runpod interface to ensure successful completion.
 ### Troubleshooting
* If your bucket is not publicly viewable and you encounter errors, refer to [Google Cloud Storage's documentation on making data public](https://cloud.google.com/storage/docs/access-control/making-data-public) for necessary adjustments.
Remember to keep your Service Account JSON key confidential to maintain the security of your Google Cloud resources.
## Azure Blob Storage Setup and Data Transfer with Runpod
### Creating a Storage Account in Azure
1. **Create a Resource Group in Azure:**
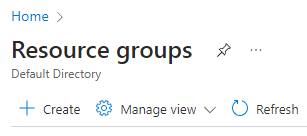
* Go to [Resource Groups](https://portal.azure.com/#view/HubsExtension/BrowseResourceGroups) and click the Create button.
* Name the resource group, which will be used to organize your Azure resources.
2. **Set Up a Storage Account:**
* Under [Storage Accounts](https://portal.azure.com/#view/HubsExtension/BrowseResource/resourceType/Microsoft.Storage%2FStorageAccounts), click Create.
* Provide a name for your storage account and assign it to the newly created resource group.
3. **Retrieve Access Key:**
* Navigate to Access Keys under Security + Networking in your storage account to get the key needed for authentication.
4. **Create a Blob Container:**
* In the Storage Browser, select Blob Containers, then click Add Container.
* Optionally, create folders within this container for better organization.
### Troubleshooting
* If your bucket is not publicly viewable and you encounter errors, refer to [Google Cloud Storage's documentation on making data public](https://cloud.google.com/storage/docs/access-control/making-data-public) for necessary adjustments.
Remember to keep your Service Account JSON key confidential to maintain the security of your Google Cloud resources.
## Azure Blob Storage Setup and Data Transfer with Runpod
### Creating a Storage Account in Azure
1. **Create a Resource Group in Azure:**
* Go to [Resource Groups](https://portal.azure.com/#view/HubsExtension/BrowseResourceGroups) and click the Create button.
* Name the resource group, which will be used to organize your Azure resources.
2. **Set Up a Storage Account:**
* Under [Storage Accounts](https://portal.azure.com/#view/HubsExtension/BrowseResource/resourceType/Microsoft.Storage%2FStorageAccounts), click Create.
* Provide a name for your storage account and assign it to the newly created resource group.
3. **Retrieve Access Key:**
* Navigate to Access Keys under Security + Networking in your storage account to get the key needed for authentication.
4. **Create a Blob Container:**
* In the Storage Browser, select Blob Containers, then click Add Container.
* Optionally, create folders within this container for better organization.
 ### Transferring Data from Runpod to Azure Blob Storage
1. **Access Cloud Sync in Runpod:**
* Go to your pod in My Pods on Runpod.
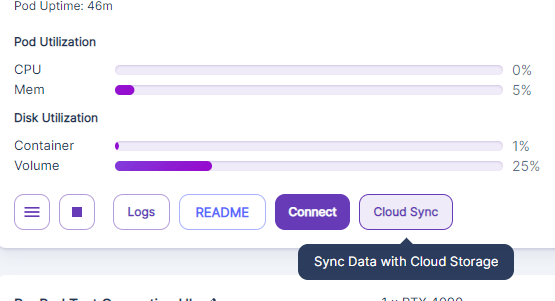
* Select Cloud Sync, then choose "Azure Blob Storage" and "Copy to Azure Blob Storage."
2. **Input Storage Details:**
* Enter your Azure account name and account key.
* Specify the desired path in the blob storage where the data will be transferred.
3. **Initiate Transfer:**
* Click on "Copy to Azure Blob Storage" to start the process.
* Your Runpod data will begin copying over to the specified location in Azure Blob Storage.
### Transferring Data from Runpod to Azure Blob Storage
1. **Access Cloud Sync in Runpod:**
* Go to your pod in My Pods on Runpod.
* Select Cloud Sync, then choose "Azure Blob Storage" and "Copy to Azure Blob Storage."
2. **Input Storage Details:**
* Enter your Azure account name and account key.
* Specify the desired path in the blob storage where the data will be transferred.
3. **Initiate Transfer:**
* Click on "Copy to Azure Blob Storage" to start the process.
* Your Runpod data will begin copying over to the specified location in Azure Blob Storage.
 Ensure secure handling of your Azure account key to maintain the integrity and security of your data during the transfer process.
## Backblaze B2 Cloud Storage Setup
### Creating a Bucket in Backblaze B2
1. **Navigate to Bucket Creation:**
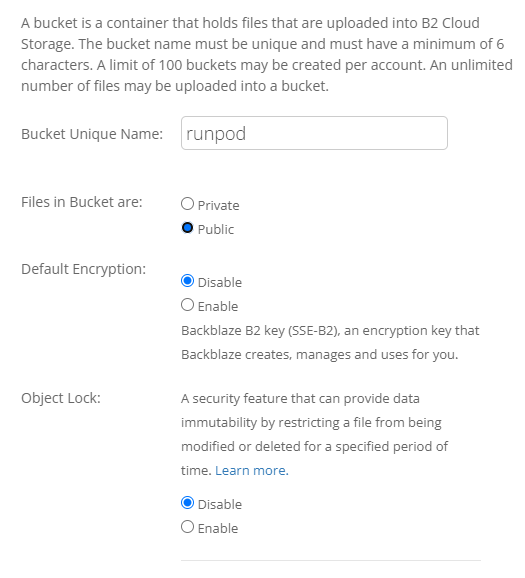
* Go to [B2 Cloud Storage Buckets](https://secure.backblaze.com/b2_buckets.htm) and click "Create a Bucket."
* Make sure to set the bucket visibility to Public.
2. **Generate Application Key:**
* Visit [App Keys](https://secure.backblaze.com/app_keys.htm) to create a new application key. This key will be used for authenticating access to your bucket.
Ensure secure handling of your Azure account key to maintain the integrity and security of your data during the transfer process.
## Backblaze B2 Cloud Storage Setup
### Creating a Bucket in Backblaze B2
1. **Navigate to Bucket Creation:**
* Go to [B2 Cloud Storage Buckets](https://secure.backblaze.com/b2_buckets.htm) and click "Create a Bucket."
* Make sure to set the bucket visibility to Public.
2. **Generate Application Key:**
* Visit [App Keys](https://secure.backblaze.com/app_keys.htm) to create a new application key. This key will be used for authenticating access to your bucket.
 ### Transferring Data from Runpod to Backblaze B2
1. **Access CloudSync in Runpod:**
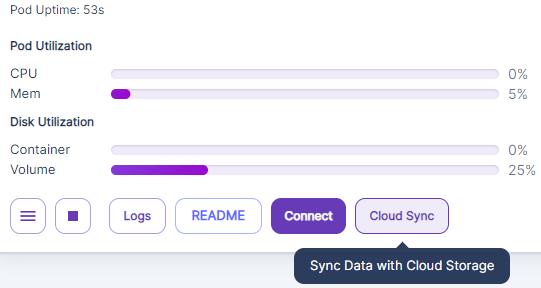
* On your My Pods screen in Runpod, select Cloud Sync, then choose "Backblaze B2."
2. **Enter Credentials:**
* Input your KeyID in the first field.
* Enter your applicationKey in the second field.
* Specify your bucket name as illustrated in the interface.
3. **Initiate Transfer:**
* Click "Copy to Backblaze B2" to start the transfer process. Your pod's contents will begin transferring to the specified Backblaze B2 bucket.
### Transferring Data from Runpod to Backblaze B2
1. **Access CloudSync in Runpod:**
* On your My Pods screen in Runpod, select Cloud Sync, then choose "Backblaze B2."
2. **Enter Credentials:**
* Input your KeyID in the first field.
* Enter your applicationKey in the second field.
* Specify your bucket name as illustrated in the interface.
3. **Initiate Transfer:**
* Click "Copy to Backblaze B2" to start the transfer process. Your pod's contents will begin transferring to the specified Backblaze B2 bucket.
 Remember to securely manage your KeyID and applicationKey to ensure the safety of your data in Backblaze B2 Cloud Storage.
## Dropbox Setup and Data Transfer with Runpod
### Setting Up Dropbox
1. **Create an App on Dropbox:**
* Go to the [DBX Platform](https://www.dropbox.com/developers/apps/create) and create an app.
* Choose "Scoped Access" under API options and "Full Dropbox" for the type of access. Then, name your app.
2. **Configure App Permissions:**
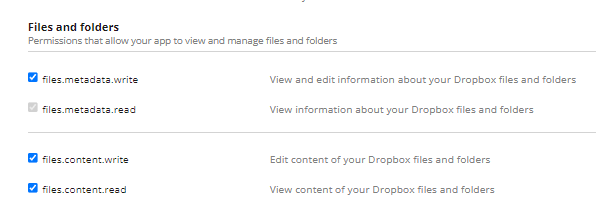
* In the Dropbox App Console, under the Permissions tab, make sure to enable the required checkboxes for reading and writing access.
3. **Generate Access Token:**
* Return to the Settings tab of your app.
* In the OAuth2 section, click "Generate" under Generated Access Token to create an access key.
* Save this key securely, as it is crucial for integrating with Runpod and will not be visible after leaving the page.
4. **Create a Dropbox Folder (Optional):**
* Although not mandatory, it's advisable to create a dedicated folder in Dropbox for organizing the data synced from Runpod.
Remember to securely manage your KeyID and applicationKey to ensure the safety of your data in Backblaze B2 Cloud Storage.
## Dropbox Setup and Data Transfer with Runpod
### Setting Up Dropbox
1. **Create an App on Dropbox:**
* Go to the [DBX Platform](https://www.dropbox.com/developers/apps/create) and create an app.
* Choose "Scoped Access" under API options and "Full Dropbox" for the type of access. Then, name your app.
2. **Configure App Permissions:**
* In the Dropbox App Console, under the Permissions tab, make sure to enable the required checkboxes for reading and writing access.
3. **Generate Access Token:**
* Return to the Settings tab of your app.
* In the OAuth2 section, click "Generate" under Generated Access Token to create an access key.
* Save this key securely, as it is crucial for integrating with Runpod and will not be visible after leaving the page.
4. **Create a Dropbox Folder (Optional):**
* Although not mandatory, it's advisable to create a dedicated folder in Dropbox for organizing the data synced from Runpod.
 ### Transferring Data from Runpod to Dropbox
1. **Access Cloud Sync in Runpod:**
* In Runpod, navigate to the Cloud Sync option and select Dropbox.
2. **Enter Access Token and Path:**
* Input your Dropbox Access Token.
* Specify the remote path in Dropbox where you want to send the data.
3. **Start Data Sync:**
* Click "Copy to Dropbox" to initiate the data syncing process. Your Runpod data will begin transferring to the specified location in Dropbox.
### Transferring Data from Runpod to Dropbox
1. **Access Cloud Sync in Runpod:**
* In Runpod, navigate to the Cloud Sync option and select Dropbox.
2. **Enter Access Token and Path:**
* Input your Dropbox Access Token.
* Specify the remote path in Dropbox where you want to send the data.
3. **Start Data Sync:**
* Click "Copy to Dropbox" to initiate the data syncing process. Your Runpod data will begin transferring to the specified location in Dropbox.
 Ensure the safekeeping of your Dropbox Access Token to maintain the security of your data during the sync process.